Problem:
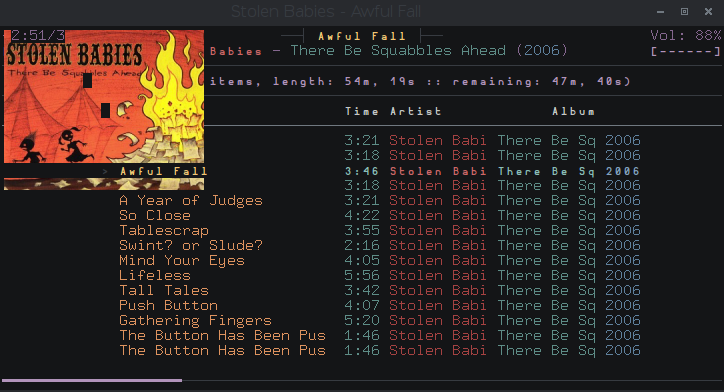
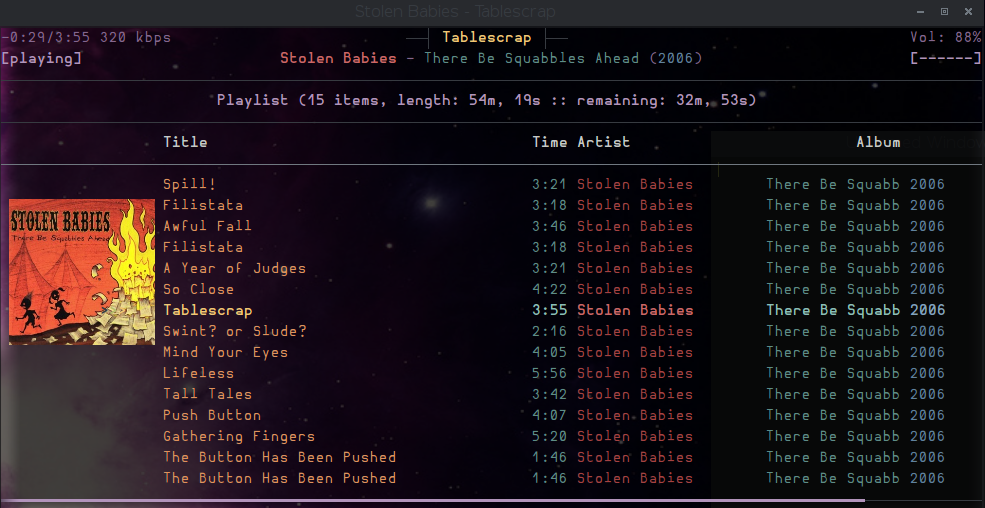
Ncmpcpp is a great front end for the MPD despite the ability of showing album covers. I just can’t ignore all the great arts come with the great music.
Reason:
It just can’t…
The way to success:
w3m is the first one popped out in my mind, which is a console web browser that’s capable of displaying images with true colors.
it actually uses a binary /usr/lib/w3m/w3mimgdisplay to display images.
>echo -e "0;1;w;h;x;y;;;;;/tmp/cover.jpg;" | /usr/lib/w3m/w3mimgdisplay #w,h,x,y stand for width, height, x position, y position
Boom!!!!!!!!!!! I failed…. No matter how hard i tried to type the command with the correct number of semi-colon into urxvt i got nothing but a sad face.
w3mimgdisplay is not able to display any images in a urxvt terminal of depth 32 as well as a transparent window !
so i started urxvt with -depth 24 -font 9×15 and enter the command again.
well……. the image got destroyed everytime after the terminal redrawn (e.g. message updated, terminal resized)
Solutions:
i discover that urxvt supports background image but therxvt-unicode package from the arch linux official repo is not compiled with the options –enable-pixbuf that meant i had to compile it by myself. Okayyy…….
detail please refer to Download Source Code with Pacman on Arch. Before you compile the source just edit the PKGBUILD and type –enable-pixbuf in the build option.
you can use
>urxvt -pixmap /path/to/your/image
or XTerm operating system command
>printf "\e]20;/path/to/your/file;\a"
to test if it works.
write a script that can scale down the cover art and place it in the position you want.
add the script name to exexute_on_song_change option in ~/.ncmpccp/config.
the script below is a modified version. the original one’s here
#!/bin/bash

MUSIC_DIR=$HOME/documents/music

COVER=/tmp/cover.jpg

function reset_background
{
    printf "\e]20;;100x100+1000+1000\a"
}

{
    album="$(mpc --format %album% current)"
    file="$(mpc --format %file% current)"
    album_dir="${file%/*}"
    [[ -z "$album_dir" ]] && exit 1
    album_dir="$MUSIC_DIR/$album_dir"

    covers="$(find "$album_dir" -type d -exec find {} -maxdepth 1 -type f -iregex ".*/.*\(${album}\|cover\|folder\|artwork\|front\).*[.]\(jpe?g\|png\|gif\|bmp\)" \; )"
    src="$(echo -n "$covers" | head -n1)"
    rm -f "$COVER"
    if [[ -n "$src" ]] ; then
        #resize the image's width to 300px
        convert "$src" -resize 300x "$COVER"
        if [[ -f "$COVER" ]] ; then
           #scale down the cover to 30% of the original
           #place it 1% away from left and 50% away from top.
           printf "\e]20;${COVER};30x30+1+50:op=keep-aspect\a"
        else
            reset_background
        fi
    else
        reset_background
    fi
} &
final step! enjoy your music with ncmpcpp with COVER!
References: